on all orders over $150*
on all orders over $150*
on all orders over $150*
on all orders over $150*

Have you ever been on a routine job, only to come across an old, Weiser style of lock? Allow us to show you a quick and easy way to get it apart so you can rekey it.
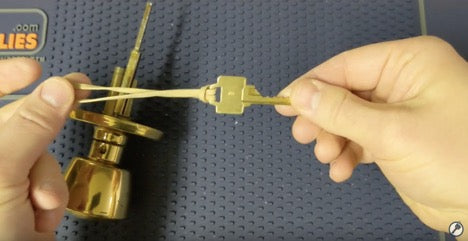
To rekey the old weiser lock, you’ll need to get the center knob cylinder out. To accomplish this, you’ll need a W15 key cut to all nines and a rubber band.
Take the rubber band and put it through the keyring hole at the top of the W15 key. Then create a knot by running the rubber band through itself in order to secure it. Once you have that complete, take the knob and stick the key into the lock.

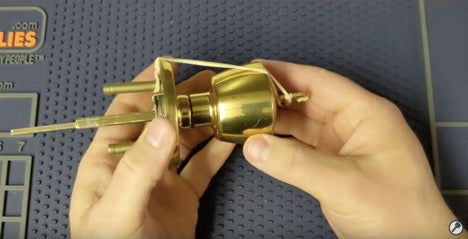
Take the rubber band and wrap it around the key twice so that the pressure is on the clockwise position. Then, stretch out the rubber band and wrap it around the nearest post sticking out of the other side of the lock.

Flip the knob upside and down, and hold the tailpiece back. Start to gently pound the wiser lock over a hard surface, but you might want to use a mat of some kind in order to prevent scuffs and dings (either on the lock or on the hard surface).
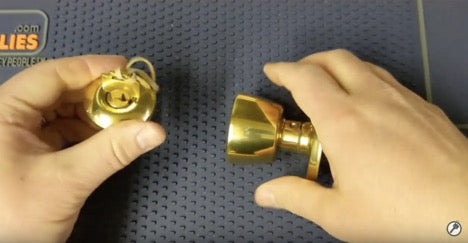
You’re looking for either the key to spin or for the entire cylinder to pop out; either way will enable you to get the lock apart by removing the center knob cylinder. It will likely require around five taps of holding the tail piece back while tapping the wiser lock against the hard surface to get it apart.

With the center knob cylinder now removed, you can also take the rubber band off and remove the W15 key from the cylinder. At this point, you’re good to go to rekey the entire weiser lock.
When putting the wiser lock back together, make sure to insert the new key you’ve rekeyed the lock cylinder and place the cylinder back into the wiser lock. After inserting the cylinder into place, hold back the tailpiece and turn the cylinder approximately to the five o’clock position. The cylinder should lock back in fully, and you’ll be good to go.
You can view the full video for this post on YouTube here: https://youtu.be/0EWcHzl_f8k
Don’t forget to like and subscribe to our channel where we upload new tutorials on locksmithing every month.