on all orders over $150*
on all orders over $150*
on all orders over $150*
on all orders over $150*

When it comes to engraving keys, I recently did a content on the Triton Plus by engraving some text. It draws many requests to see the “logo feature.” So here we go.
INSTRUCTIONS
Do not set your expectations to incredibly high. This isn't a laser engraver even though it's known as a laser machine.
ENGRAVING THE LOGO
When we have the image we want to engrave onto the USB, stick it into the back of the machine

Next, tap “Engraving” on the screen.

I used a neuter bow key; you can see it in the machine. Hit “Measure” as if we were doing text because we need to know what type of area we're going to be working with.

Once the little pink box appears, look at the key itself to see where we want to put the logo.

Tap the logo and hit “OK.”

Drag the image to your desired position inside the pink box. Check if the engraving bit was installed. Hit “Cut.”

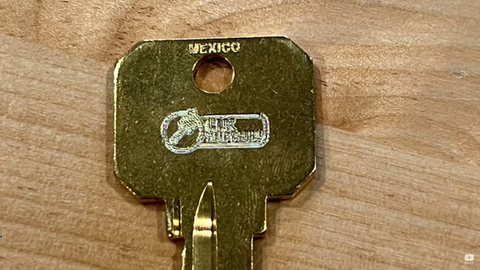
Here’s the closer look to the output.

AFTER TALK
That's what it looks like. Honestly, it looks right about what I was thinking. The image was small with little text “CLK supplies.” It's not bad. I'm glad I could push the limits a little bit to see so you could see exactly what to expect in the real world if you want to do an image. We didn't want to put some easy logo that would look absolutely beautiful. We want to keep it real. So, if you're going to do an image, try to make sure you have one color, make it nice and crystal clear, and make it as big as possible on the key to let the cutter get as much detail as possible.
I want to know what you think of the Triton plus when it comes to engraving tiny images. Include the #LockBoss to automatically get entered to win one of five free prizes we give away each week on YouTube. We'll see you in the comments!